The Complete Guide to Closing and Winterizing Your Pool in Ontario
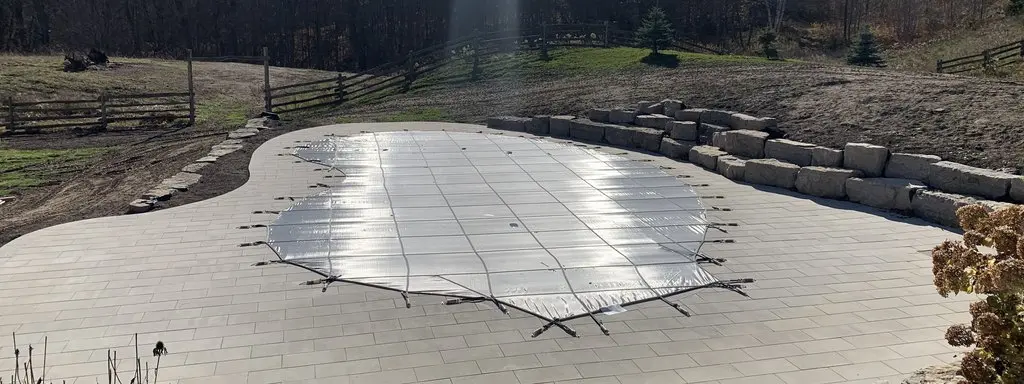
Wondering how to close a pool in Ontario before winter? A successful closing starts before you shut down the pump. First, clean and test the water. Next, prepare the plumbing and equipment for freezing temperatures. Finally, install the correct winter cover for your pool.
However, pool closing is not a one-size-fits-all process. An inground vinyl liner pool can require a different approach than a fibreglass, onground or above-ground pool. Therefore, this guide explains the overall winterizing process while highlighting the steps that depend on your specific pool and equipment.
Quick answer: When should you close your pool in Ontario?
Many Southern Ontario pool owners plan their closing for September or October. However, weather and water temperature matter more than a fixed date. Closing too early can leave warm water under the cover, while waiting too long can expose plumbing and equipment to freezing temperatures.
In this guide:
Important: Pool closing is not one-size-fits-all. Follow the instructions for your exact pool structure, liner or shell, winter cover, pump, filter, heater and sanitizer. Do not use generic chemical doses or universal water-lowering depths. If you cannot confidently identify a plumbing line, valve or shutdown step, contact a qualified pool technician.
When to Close a Pool in Southern Ontario
When deciding how to close a pool in Ontario, start with the weather. September and October provide a practical planning window for many homeowners. Still, the forecast should guide your final timing.
For example, warm water can support algae growth. In contrast, freezing temperatures can damage plumbing, heaters and other equipment that still contain water. Therefore, leave enough time to complete the closing before a sudden cold snap.
A Simple Fall Pool Closing Timeline
- One to two weeks before closing: confirm your pool type, locate equipment manuals, inspect the winter cover and arrange professional service if needed.
- Several days before closing: remove leaves and debris, clean the pool and test the water.
- On closing day: follow the correct water-level plan, protect the plumbing and equipment, and install the winter cover.
- During winter: inspect the cover, drainage and sump well where applicable after major weather events.
As a result, planning ahead can prevent last-minute problems such as missing winter plugs, damaged cover hardware or equipment that will not drain correctly.
What to Do Before Closing Your Pool
The technical winterization is only part of a proper pool closing. Before that work begins, prepare the water and pool area so everything is ready for shutdown.
Step 1: Clean the Pool Thoroughly
First, skim leaves and debris from the surface. Then, brush the walls and waterline and vacuum the pool floor. Also, empty accessible skimmer and pump baskets.
A clean pool in the fall generally leads to an easier spring opening. In addition, removing organic debris before closing can reduce staining and poor water conditions over winter.
Step 2: Test and Balance the Water
Next, test the pool water while the circulation system can still operate. Check the sanitizer, pH, total alkalinity and calcium hardness that apply to your pool.
However, do not copy chemical quantities from another pool or an old checklist. Pool volume, sanitizer type, current chemistry, product concentration and surface materials can all change what your water needs.
Therefore, follow your water-test results and the directions on the products you use. For additional help, visit a Pioneer Family Pools location for professional water testing.
Avoid this mistake: Some closing products need circulation to distribute properly. Therefore, read the product directions and complete any circulation-dependent treatment before shutting down the pump.
Step 3: Check the Sump Well
If your pool installation includes a sump well, check it before lowering the pool water. Significant groundwater around the pool can affect the structure and the closing process.
In particular, fibreglass shells and vinyl liners can be sensitive to groundwater pressure and incorrect water levels. Therefore, follow the requirements for your specific installation.
Step 4: Remove Drop-In Steps and Seasonal Items
Remove drop-in steps and sandbags before the closing appointment. Also, remove any ladders, fittings or accessories that your pool instructions require you to store for winter.
Step 5: Gather Your Winterizing Accessories
Depending on your pool, you may need:
- Correctly sized winter plugs or caps
- Approved skimmer protection
- Winter cover and required hardware
- Compatible water bags or restraints where applicable
- Step-cover components where applicable
- Manufacturer-approved winterizing accessories
Pool Winterizing Supply Checklist
Gather everything before shutting down circulation. Your exact list will depend on your pool and equipment.
Cleaning and Water Care
- Leaf net or skimmer
- Pool brush
- Vacuum or robotic cleaner
- Water-test kit or professional water test
- Water-balancing products based on your test results
- Appropriate winterizing products
You can also shop pool closing chemicals after confirming what your pool actually needs.
Plumbing and Equipment
- Correctly sized winter plugs or caps
- Skimmer protection where applicable
- Pump, filter, heater and sanitizer manuals
- Labelled bags or containers for removable parts
- Correct line-clearing equipment when a trained person will perform that work
Winter Cover
- A compatible winter cover
- Intact straps or fasteners
- Correct anchors, cables or water bags where applicable
- Manufacturer-approved cover accessories
Browse pool closing accessories before closing day.
How to Winterize Your Pool
Once you finish the preparation work, you can move into the technical winterization. The exact procedure depends on your pool design and equipment. Therefore, use this section as a planning guide and follow the manufacturer manuals for the actual shutdown process.
Step 1: Confirm the Correct Winter Water Level
First, determine the correct winter water level for your pool, winter cover and plumbing configuration. Do not assume every pool needs the same amount of water removed.
In addition, check local water-discharge requirements before draining. Municipal rules can affect where and how you may discharge pool water.
Step 2: Protect the Plumbing
Next, protect vulnerable suction, return and skimmer lines from freezing. A trained person should clear the appropriate plumbing lines and use winter plugs or protection that match the system.
This step matters because water expands when it freezes. As a result, trapped water can crack fittings, damage plumbing or create leaks that become obvious when you reopen the pool.
Step 3: Shut Down and Drain the Equipment
Follow the winterizing instructions for each piece of equipment, including:
- Pool pump
- Filter
- Heater or heat pump
- Salt system or chlorinator
- Water features
- Other equipment connected to the circulation system
Also, keep removable plugs, pressure gauges and small parts together. That way, you can find them easily when you open the pool in spring.
Step 4: Add the Correct Closing Products
After testing and balancing the water, use the closing products recommended for your pool and water conditions.
However, product formulations and pool volumes vary. Therefore, follow the product label and your water-test recommendations rather than using one fixed closing-kit dosage.
Step 5: Install the Winter Cover
Finally, install the winter cover according to its instructions. Before you finish, check the fit, anchors, track, straps or other restraints to make sure the cover sits correctly.
How Pool Closing Changes by Pool Type
The overall goal stays the same: protect the pool structure, plumbing and equipment. However, different pool types need different precautions.
Inground Vinyl Liner Pools
- Pay close attention to buried plumbing and skimmers.
- Maintain the water level required for the liner and winter cover.
- Avoid excessive water removal, which can allow the liner to shift or wrinkle.
- Handle ladders, steps and fittings carefully to avoid damaging the liner.
Fibreglass Pools
- Water helps provide structural support to the shell.
- Groundwater can place pressure on the outside of the pool.
- Never fully drain or significantly lower the pool based on generic advice.
- Follow the shell manufacturer’s water-level and groundwater guidance.
Onground Pools
- Expect a mix of exposed and buried plumbing.
- Consider deck access and the pool’s wall configuration.
- Follow the actual installation instead of assuming an inground or above-ground procedure covers every connection.
Above-Ground Pools
- Check exposed hoses, skimmers and return fittings.
- Follow the manufacturer’s instructions for seasonal equipment.
- Do not assume you should empty the pool.
- Monitor the structure and attached fittings through winter.
Protecting Pumps, Filters, Heaters and Other Equipment
A pool can look perfectly clean and still suffer expensive freeze damage. For example, even a small amount of water trapped inside vulnerable equipment can freeze and expand.
Pool Pump
Follow the pump manufacturer’s shutdown and drainage instructions. In addition, remove and store applicable drain plugs so they are easy to find in spring.
Pool Filter
Sand, cartridge and D.E. filters have different winterizing procedures. Therefore, use the instructions for your exact filter instead of applying one process to every model.
Heater or Heat Pump
Heaters can retain water in areas that are not obvious from the outside. As a result, proper shutdown and drainage are especially important.
Gas and electrical equipment also require the correct shutdown procedures. Therefore, follow the manufacturer instructions and use qualified professionals where required.
Salt System or Chlorinator
Check the manufacturer’s winter-storage procedure for your salt cell or chlorinator. Depending on the system, the manufacturer may require cleaning, drainage or indoor storage.
Safety note: Do not experiment with compressed air, gas connections or electrical equipment. Incorrect pressure or shutdown procedures can damage equipment and create a safety hazard.
Choosing the Right Winter Pool Cover
A winter cover helps keep debris out, limit light and protect the pool during the off-season. However, not every winter cover serves the same purpose.
Anchored Safety Covers
Safety covers secure to rated anchors around compatible pools. Before winter, inspect the cover material, springs, straps and anchors. In addition, follow the manufacturer’s requirements for installation, tension and snow loads.
Lock-In Vinyl Covers
Lock-in covers fit into a compatible track around the pool. Therefore, inspect the track and confirm that the cover sits correctly. Pools with steps may also require a separate step-cover configuration.
Standard Winter Covers
A standard winter cover can help block debris and light. However, it is not automatically a safety cover. Use compatible restraints and follow the cover manufacturer’s instructions.
Above-Ground Winter Covers
Above-ground covers must match the pool’s wall and rail configuration. In addition, follow the manufacturer’s instructions for cover tension, support and winter inspections.
Explore Pioneer safety covers or pool closing cover options.
Remember: A winter cover does not replace fencing, locked access or supervision. In addition, never walk on a winter cover unless its certified use and manufacturer instructions specifically allow it.
DIY vs. Professional Pool Closing
Some pool owners can safely complete much of the preparation themselves. For example, cleaning, water testing and organizing winter accessories may be straightforward when you know your pool well.
However, technical winterization carries more risk. Multiple buried plumbing lines, heaters, unfamiliar salt systems, fibreglass shells and complex water features can require specialized tools and experience.
Consider Professional Help If You:
- Cannot identify every plumbing line
- Suspect a leak
- Have damaged or missing winter plugs
- Cannot confirm the correct water level
- Need to winterize a heater or special water feature
- Do not have the correct tools or training
Before booking, confirm what the service includes, what you need to prepare and whether your municipality has specific water-discharge requirements.
Common Pool Closing Mistakes to Avoid
- Closing too early: warm water may encourage algae growth.
- Closing a dirty pool: leaves and debris can contribute to staining and a more difficult spring opening.
- Guessing chemical doses: incorrect treatment can create water-balance problems.
- Lowering too much water: excessive draining can affect structural support for certain shells and liners.
- Missing a plumbing line: trapped water can freeze and damage the system.
- Ignoring specialized equipment: heaters, salt systems and water features can require separate procedures.
- Using the wrong cover: poor fit or incorrect tension can damage the cover or create unsafe conditions.
- Ignoring drainage or the sump well: groundwater conditions can change throughout winter.
Pool Closing Checklist: Save This for Fall
Before Closing
- Confirm your pool type
- Locate the equipment manuals
- Choose your closing date
- Book professional help if needed
- Inspect the winter cover
- Check local water-discharge requirements
- Clean the pool
- Test and balance the water
- Check the sump well where applicable
On Closing Day
- Confirm the correct winter water level
- Protect applicable plumbing lines
- Drain and secure equipment according to its manual
- Protect the skimmer as required
- Store removable accessories
- Install the winter cover correctly
- Photograph valve and equipment settings for spring
During Winter
- Inspect the cover after major storms
- Monitor drainage and the sump well where applicable
- Check the appropriate pool water level
- Keep access barriers secured
- Contact a professional if you notice a leak, structural movement or another unsafe condition
Keep Your Pool Closing Checklist Handy
Download and print the one-page checklist so you can keep the key fall and winter tasks in one place.
PRINTABLE POOL CLOSING CHECKLISTFrequently Asked Questions About Pool Closing in Ontario
How Do I Winterize an Inground Pool in Ontario?
First, clean and test the water. Next, follow the approved water-level, plumbing, equipment and cover instructions for your inground pool. Because buried pipes can suffer freeze damage, contact a professional if you cannot identify every plumbing line.
How Do I Close an Above-Ground Pool for Winter?
Clean and balance the water first. Then, follow the manufacturer’s instructions for water level, fittings and exposed equipment. Finally, install a compatible winter cover. Do not empty the pool based on generic advice.
How Do I Winterize an Onground Pool?
An onground pool may combine buried and exposed plumbing. Therefore, follow the closing plan for the actual installation instead of using a generic inground or above-ground checklist.
How Do I Winterize a Fibreglass Pool?
Fibreglass pools require careful management of both water level and groundwater. Because water helps support the shell, never significantly lower or drain the pool based only on general advice. Instead, follow the shell manufacturer’s requirements.
What Should I Do About Water Chemistry Before Closing?
Test the water while the circulation system still operates. Then, use your test results and product directions to correct any imbalance. Most importantly, do not copy chemical quantities from another pool.
Is a Safety Cover the Same as a Regular Winter Cover?
No. A properly specified safety cover provides a different function than a standard winter cover. Therefore, confirm the certification, installation requirements and intended use of the cover you own.
Does Professional Pool Closing Include Cleaning and Chemicals?
Not always. Routine vacuuming, water balancing and other preparation tasks may fall outside a standard closing service. Therefore, confirm the current service scope before your appointment.
What Happens If I Skip Winterizing My Pool Plumbing?
Water can freeze and expand inside lines, heaters and equipment. As a result, fittings can crack and leaks can appear when you restart the pool. Proper winterization reduces that risk.
Can I Book a Pool Closing Late in the Season?
Availability depends on location, demand and weather. Therefore, contact your local service provider early rather than assuming an appointment will remain available before freezing temperatures arrive.
Get Ready for a Smoother Spring Opening
A careful pool closing protects more than the water. It also helps protect the plumbing, equipment, winter cover and pool structure.
Therefore, if you are researching how to close a pool in Ontario, start by identifying your exact pool and equipment setup. Then, complete the preparation you can handle safely and use qualified professional support for technical steps you cannot confidently complete.
Ready to Close Your Pool?
Prepare your pool for winter with professional service or the right winterizing supplies from Pioneer Family Pools.
BOOK A POOL CLOSING SHOP WINTERIZING SUPPLIES