The Ultimate Guide to Keeping Your Pool Safe with Winter Safety Covers
How To Guides - Pools
As the winter season approaches, ensuring the safety and cleanliness of your pool becomes a top priority. Safety covers are a fantastic solution to safeguard your pool from the harsh elements and keep it clean throughout the colder months. In this comprehensive guide, we'll delve into the benefits of safety covers, the customization process, and step-by-step instructions for using and storing your cover.
Why Choose a Safety Cover
Safety covers offer a range of advantages that make them an essential investment for pool owners. The benefits include:
Protection
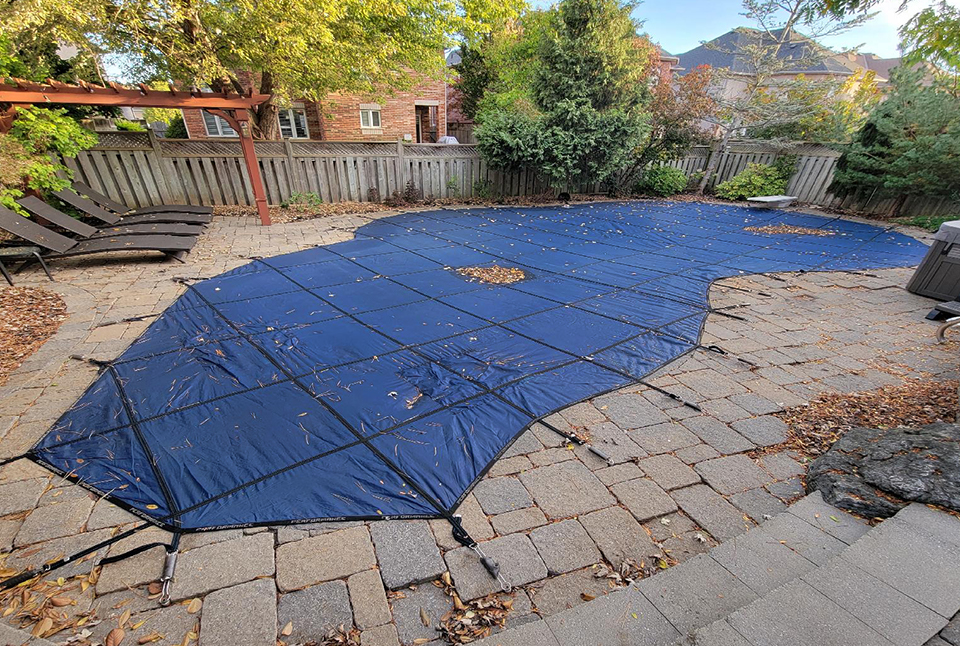
Safety covers shield your pool from debris, leaves, and snow, preventing them from contaminating the water.
Safety
These covers are designed to support the weight of a person, providing an additional layer of protection against accidental falls into the pool.
Algae Prevention
The shade mesh cover reduces sunlight exposure, minimizing algae growth and making pool opening easier in the spring.
Durability
Made in Canada, these covers boast high abrasion resistance and tear strength, ensuring longevity even in harsh weather conditions.
Custom Fit
Safety covers can be tailored to fit any pool shape, size, or feature, including raised walls, waterfalls, and more.
Customizing Your Safety Cover
Getting a custom-fit safety cover is a straightforward process:
Measuring Your Pool
Our professionals will assess your pool's dimensions, water features, and decking to determine the necessary hardware.
Approval of Measurements
After sending your measurements to the manufacturer, they'll create a computer drawing of the cover design. Once approved, the final price will be shared with you.
Receiving Your Cover
The custom-made cover will be ready within 7-10 business days. Upon arrival, we'll schedule an installation date.
Using Your Safety Cover
Putting on and taking off your safety cover is easy with these steps:
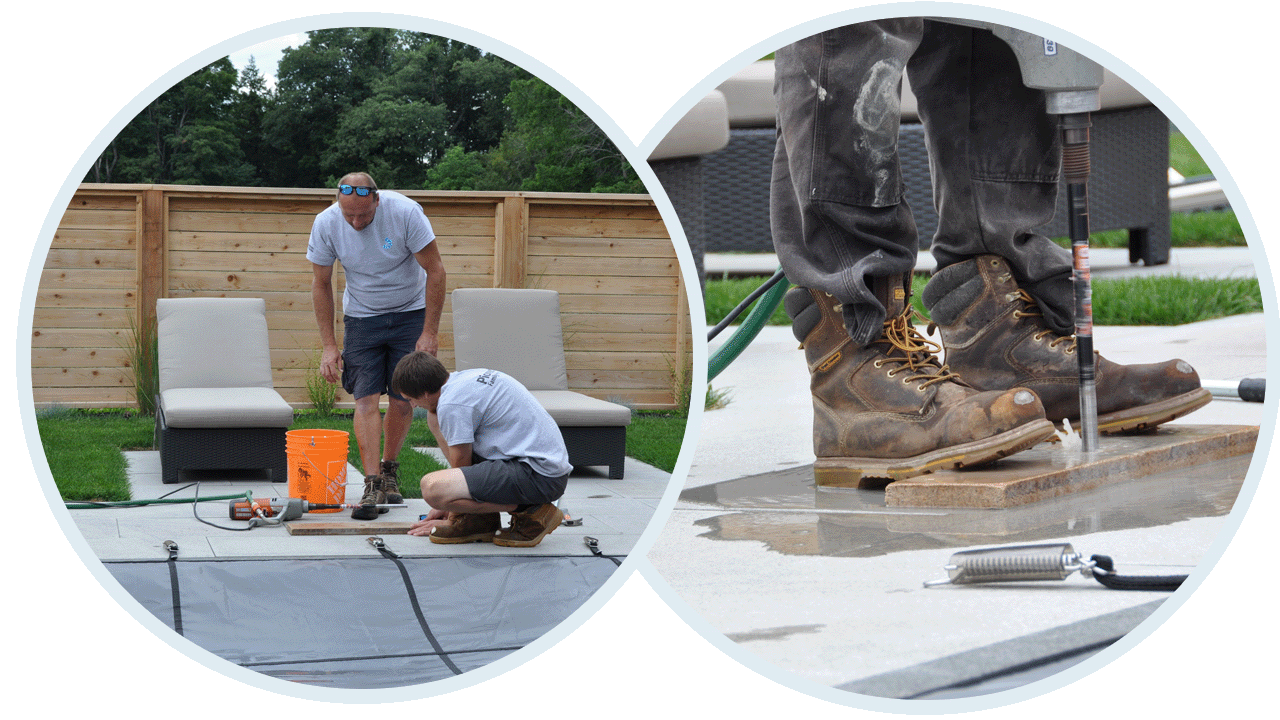
First, Preparation!
Use a garden hose or leaf blower to clear debris from the cover's surface, ensuring cleanliness.
Remove Springs
Begin by removing the steel springs one by one using the installation bar. Leave the last two springs across from each other attached.
Fold the Cover
Start folding the cover onto itself in the shallow end and then roll it up. Slide the cover into the perforated storage bag, allowing water to drain.
Store the Cover
Let the bag dry in the sun, then store it in a dry place away from rodents.
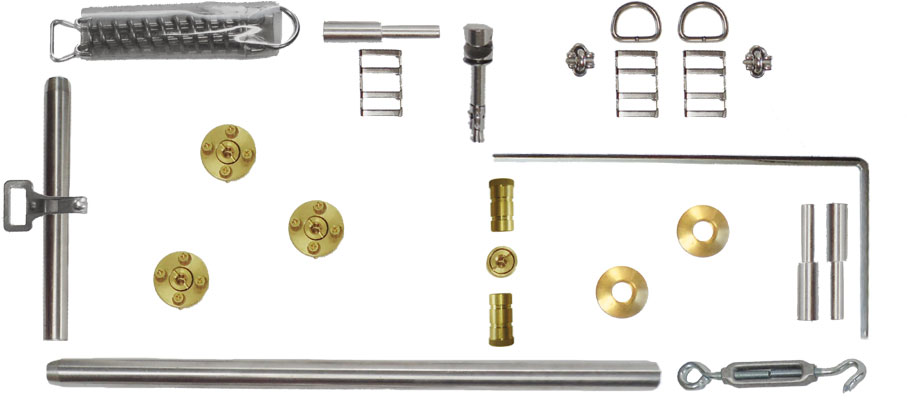
What's Included in Your Kit
Your safety cover kit contains everything you need for installation:
Anchoring Hardware
Brass or wood anchors and lawn tubes, based on your pool's specifics.
Stainless Steel Springs
An installation bar and Allan key for attaching springs and adjusting anchors.
Storage and Information
A winter storage bag to keep equipment organized, an installation manual, and warranty information.
With a custom safety cover, you're taking a proactive step towards maintaining a clean and safe pool during the winter months. By following the installation and removal process outlined in this guide, you can enjoy a hassle-free experience and peace of mind knowing that your pool is protected.
Make the smart choice for your pool's safety and longevity – invest in a quality safety cover today.